Polygon.CodeForces Tutorial
What is Polygon
According to Polygon itself, The mission of Polygon is to provide platform for creation of programming contest problems. Polygon supports the whole development cycle:
- Problem statement writing.
- Test data preparing (generators supported).
- Model solutions (including correct and wittingly incorrect).
- Judging.
- Automatic validation.
Polygon uses testlib.h in problem creation, This library is a standard solution in a professional community of problemsetters in Russia and several other countries. Many contests are prepared by using testlib.h, All-Russian school olympiads, ACM-ICPC regional contests, all Codeforces round and many others. You can read more about testlib from Codeforces blogs.
I think the best way to explain everything is by giving a problem and going through all development process, so let’s start with this simple problem.
Problem
Given an array of \(n\) integers, you should print any prime number in the array. It’s guaranteed that the array contain at least one prime number.
Constraints: \(1 \le n \le 10^3\), \(1 \le A_i \le 10^3\).
Create the problem
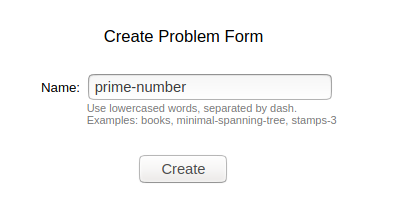
After making an account on polygon, the first thing you need to do is to create the problem, This can be done by clicking the New Problem link in the homepage, You will be asked to provide a problem name. Problem name must contain lowercased words, separated by dash. Let’s name our problem prime-number. This image contains the Create Problem Form.
After hitting Create you will get something like the image, to start edit session let’s click on Start.

Starting with the problem
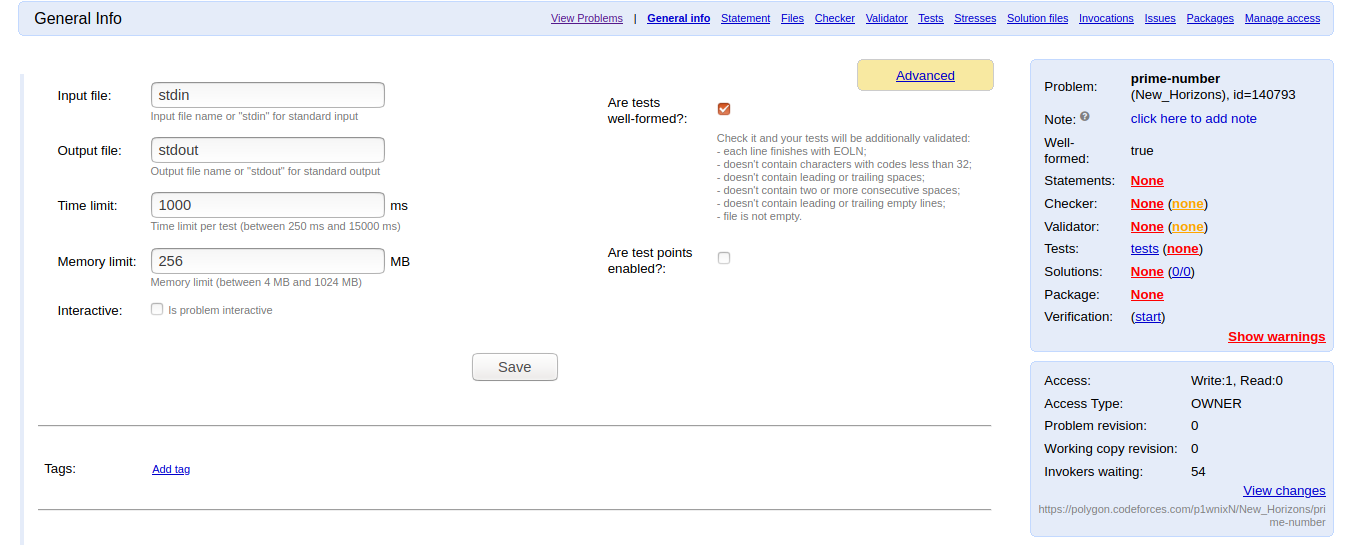
There are many things to do here, we will go by them one by one, but first let’s start with the General Info tab. This tab contains information about the problem, this includes:
- Input file - Input file name or “stdin” in case of standard input.
- Output file - Output file name or “stdout” in case of standard output.
- Time limit - Time limit per test in milliseconds.
- Memory limit - Memory limit in megabytes.
- Interactive - Used with interactive problems.
- Tags - Add tags to the problem.
- Contests - Add to existing contest.
- Statement and Tutorial sketch - Short description.
We will not change these values as the default values are suitable for our problems.
Statements
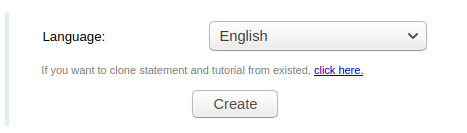
Every problem needs at least one statement, Polygon supports multiply languages statements for problem. You can choose the language and create the statement. Let’s chose English and hit create.
Problem statements are written using LaTeX. You can find several fields, this fields are:
- Name - Problem Tittle.
- Legend - Here you write the problem description.
- Input format - This field includes description of how the input is given.
- Output format - Description of how you should print the output.
- Notes - They appear under the sample tests, maybe description of the samples or some other definitions not mentioned in the Legend.
- Tutorial - Problem Tutorial.
- Files - You can add any file you want to use in the statement usually images.
After filling the fields, We can review the problem in LaTeX, HTML or PDF. Let’s view it in HTML. We should get this.
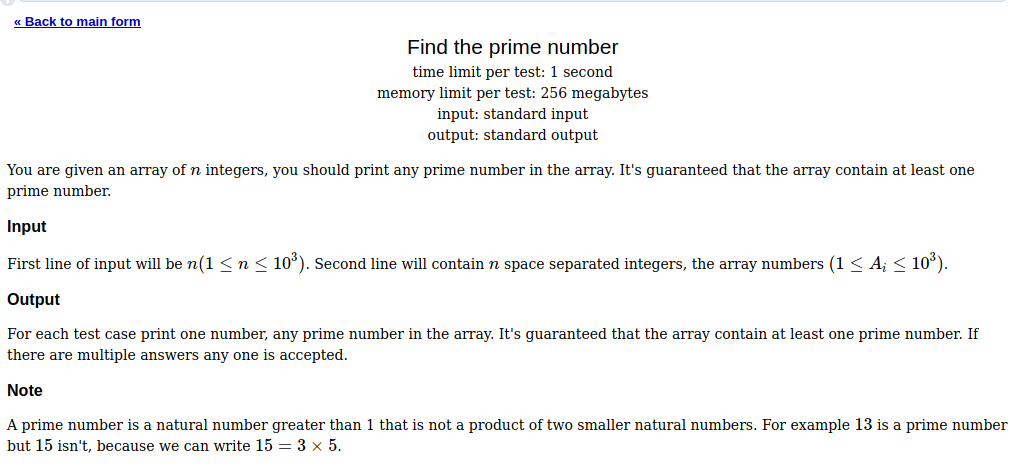
Note that there are no samples because we didn’t add any sample tests or solutions yet.
Files
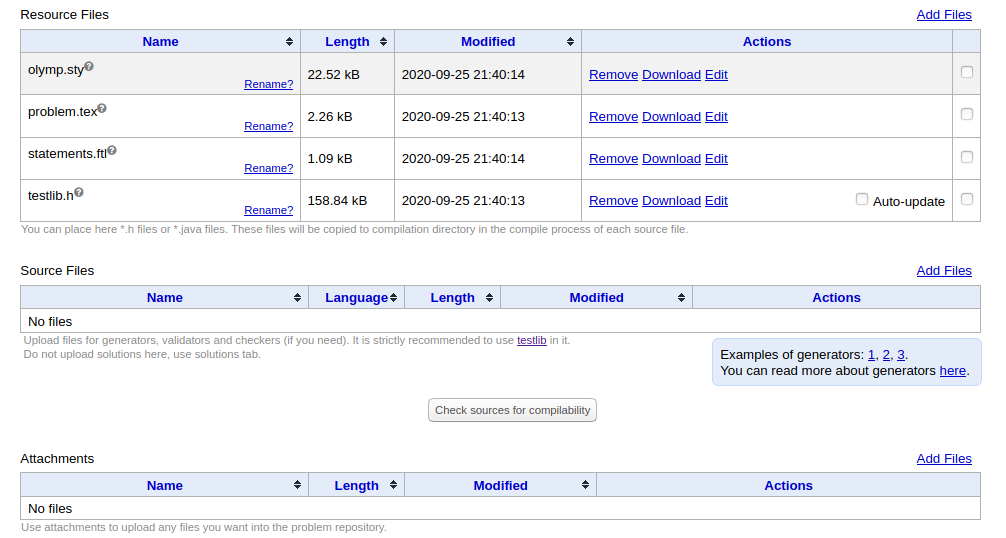
There are three types you can upload on the “Files” tab.
-
Resources - Header files, library files and other files you need in process of compilation of your sources. All resources will be copied to the compilation folder while compilation. Also some system files are resources. For example, “problem.tex” (which will be renamed) is also resources. You can change these files if you want to change some system behavior.
-
Sources - Source files of generators, checkers (verifiers) and validator. As since you can change resources and make your sources uncompilable, it is possible to that sources are compilable with the button “Check sources for compilability”. You can use one of the prewritten checker (special program which checks that answer is correct), so don’t write your own if you really don’t need it.
-
Additional files - Any other files. It can be problem manual in Microsoft Word format, some reports in Microsoft Excel or pictures. You can place here problem statement if you have non-standard statement format (for example, Microsoft Word).
Currently we will not do anything in this tab, but we will get back to it later.
Validator
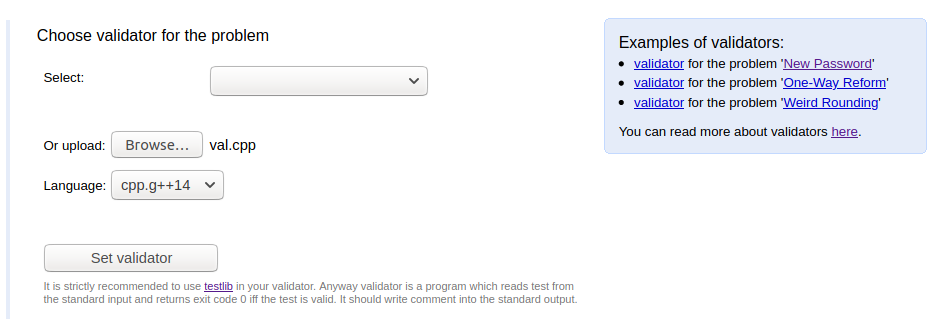
We will get back to the Checker tab after this one. Validator is a special program to validate that all the tests satisfy the constraints from the statement. It expects to get input file from the standard input. If it thinks that input is incorrect, it should return non-zero exit code and prints short message to the stdout or stderr. I am not going to talk how to write a validator because you can read about that here.
On your PC create a new file with .cpp extension and copy the following code:
1
2
3
4
5
6
7
8
9
10
11
12
13
14
15
16
17
18
19
20
21
22
23
24
25
#include "testlib.h"
#include <bits/stdc++.h>
using namespace std;
bool prime(int x){
  if(x == 1)return false;
	for(int i = 2;i * i <= x;i++){
		if(x%i == 0)return false;
	}
	return true;
}
int main(int argc, char** argv){
    registerValidation(argc, argv);
    int n = inf.readInt(1, 1000,"N");
    inf.readEoln();
    bool has_prime = false;
    for(int i = 1;i <= n;i++){
		int x = inf.readInt(1, 1000, "X");
		has_prime|=prime(x);
		if(i != n)inf.readSpace();
	}
	inf.readEoln();
    ensuref(has_prime, "There is no prime number!");
    inf.readEof();
    return 0;
}
Validator works in strict mode, so you should check for everything to match the problem description, this include new lines and white spaces, so you should check that. Also for our problem we should check if the array contain a prime number and this is done in line \(21\).
Now select the file and upload it from the Validator tab as in the image.
Validator Tests
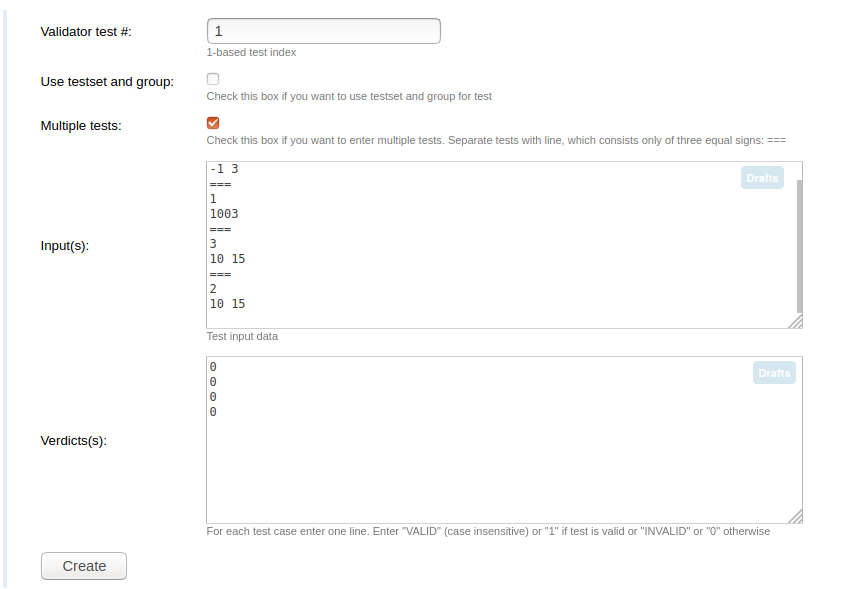
You can add tests to validate them and check if your validator handles every possible case correctly, let’s add some tests using Add test. For every test you add you should add it’s verdict \(1\) or VALID if this test is valid, and \(0\) or INVALID otherwise. You can add multiple tests by separating the tests with a line containing three equal signs \(===\).
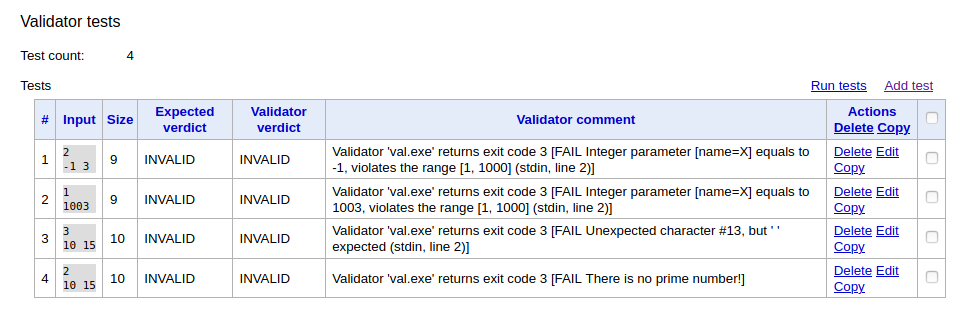
Now select the tests and hit Run tests, wait for a couple of seconds and you will get the verdict of these tests as the following.
Checker
Checker is a program that should be written when task allows more than one correct solution. A common convention is that a checker should be a program taking three command-line arguments: the testdata filename, the participant output filename and the jury answer filename. Checker should read the contents of the input, output and answer, decide whether participant answer is correct (and optimal being compared to the jury’s answer if there can be unoptimal answer in this task) and return one of several pre-defined verdicts. Same as Validator I am not going to talk how to write a checker because you can read about that here.
Polygon has some pre written checkers, you can use any of them if the problem contains one correct answer, you can use the one which is the best for your problem.
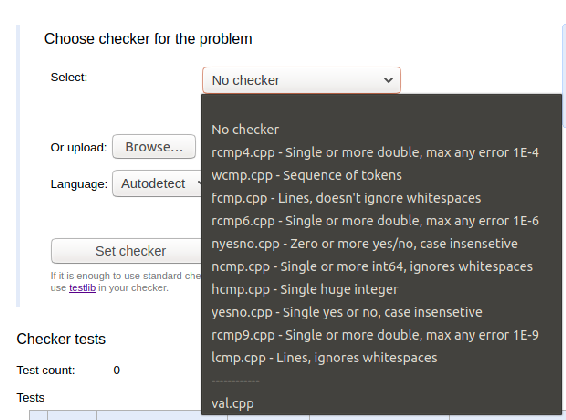
In our problem there can be multiple correct answers, that’s why we will be writing our own checker. Same as we did with the validator on your PC create a new file with .cpp extension and copy the following code:
1
2
3
4
5
6
7
8
9
10
11
12
13
14
15
16
17
18
19
20
21
22
23
24
25
26
27
28
29
30
31
32
33
34
35
36
37
#include "testlib.h"
#include <bits/stdc++.h>
using namespace std;
int n;
bool has[1010];
bool prime(int x){
  if(x == 1)return false;
	for(int i = 2; i * i <= x;i++){
		if(x%i == 0)return false;
	}
	return true;
}
int readAns(InStream& stream) {
    int ans = stream.readInt(1, 1000);
    if(has[ans] == 0)return -1;
    if(prime(ans) == 0)return 0;
    return 1;
}

int main(int argc, char * argv[]){
    registerTestlibCmd(argc, argv);
    int n = inf.readInt();
    for(int i=0;i<n;i++){
		int x = inf.readInt();
		has[x] = 1;
	}

  int jans = readAns(ans);
  int pans = readAns(ouf);
  if(jans==0)quitf(_fail, "Jury answer Incorrect, The number is not prime!!!");
  if(jans==-1)quitf(_fail, "Jury answer Incorrect, the number is not from the input array!!!");
  if(pans==0)quitf(_wa, "participant answer Incorrect, The number is not prime.");
  if(pans==-1)quitf(_wa, "participant answer Incorrect, the number is not from the input array.");
  if (!ans.seekEof())quitf(_fail, "Jury answer contain extra tokens!!!");
  if (!ouf.seekEof())quitf(_wa, "Participant answer contain extra tokens.");
  quitf(_ok, "Passed all tests.");
}
Checker Tests
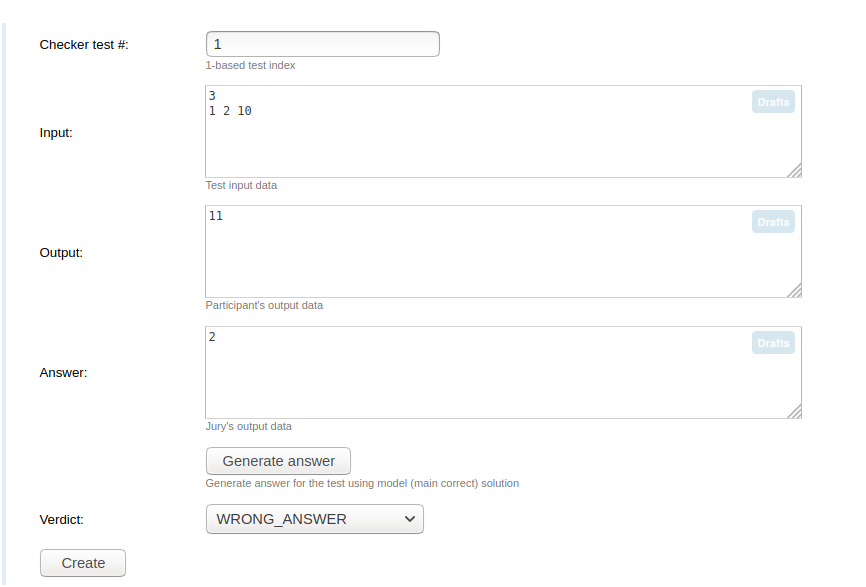
Similar to validator You can add checker tests to check if your checker handles every possible case correctly, let’s add some tests using Add test. Provide the input test, participant output, jury answer and the expected verdict.
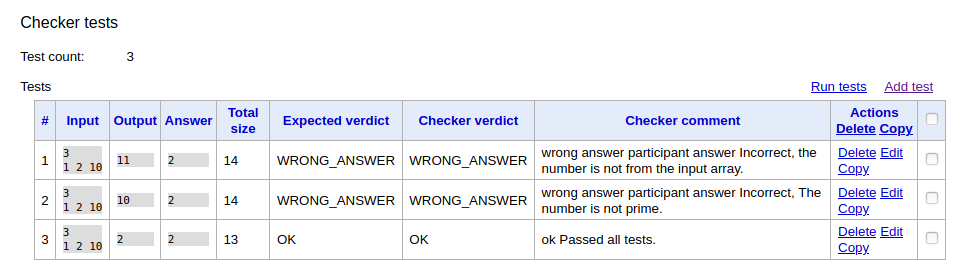
Now select the tests and hit Run tests, wait for a couple of seconds and you will get the verdict of these tests as the following.
Tests
There are three ways to add tests:
-
Use “Add Test” form - it is good way to manual test.
-
Use “script” - you can add a generator file and pass any arguments to the generator, generators are helper programs that output test. Most programming task usually has a large input (for example, an array of up to \(2 * 10^5\) elements, a tree of up to \(10^5\) vertices), so it’s not possible to add all the tests manually. In these cases, generators come to the rescue. You can read more about generators here.
-
Use “Add tests from archive” feature - upload ZIP file with the tests.
To use the first way click on Add Test and add your tests, if you want this test to be used as a sample test just click on Use in statements, polygon also gives you the ability to specify custom content of input or output data for statements. To use the third way you can click on Here you can add several tests from the archive or from the files and upload your files. Now for the second way on your PC create a new file with .cpp extension and copy the following code:
1
2
3
4
5
6
7
8
9
10
11
12
13
14
15
16
17
18
19
20
21
22
23
24
25
26
27
28
29
30
31
32
33
34
35
#include "testlib.h"
#include <bits/stdc++.h>
using namespace std;
bool prime(int x){
  if(x == 1)return false;
	for(int i = 2; i * i <= x;i++){
		if(x%i == 0)return false;
	}
	return true;
}
int main(int argc, char* argv[]){
	registerGen(argc, argv, 1);
	int min_n = atoi(argv[1]);
	int max_n = atoi(argv[1]);
	int n = rnd.next(min_n, max_n);
	cout<<n<<endl;
	vector<int>a(n);
	bool has_prime = false;
	for(int i = 0;i < n;i++){
		a[i] = rnd.next(1, 1000);
		has_prime|=prime(a[i]);
	}
	while(!has_prime){
		int x = rnd.next(1, 1000);
		has_prime|=prime(x);
		a[0] = x;
	}
	shuffle(a.begin(), a.end());
	cout<<a[0];
	for(int i = 1;i < n;i++){
		cout<<" "<<a[i];
	}
	cout<<endl;
    return 0;
}
Open the Files tab, and add this file in Source Files.

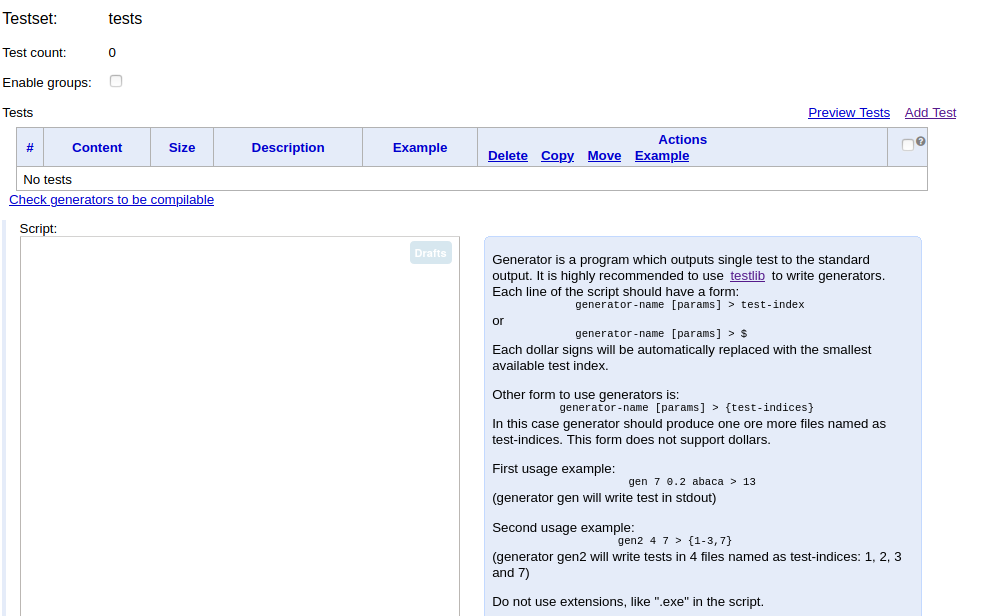
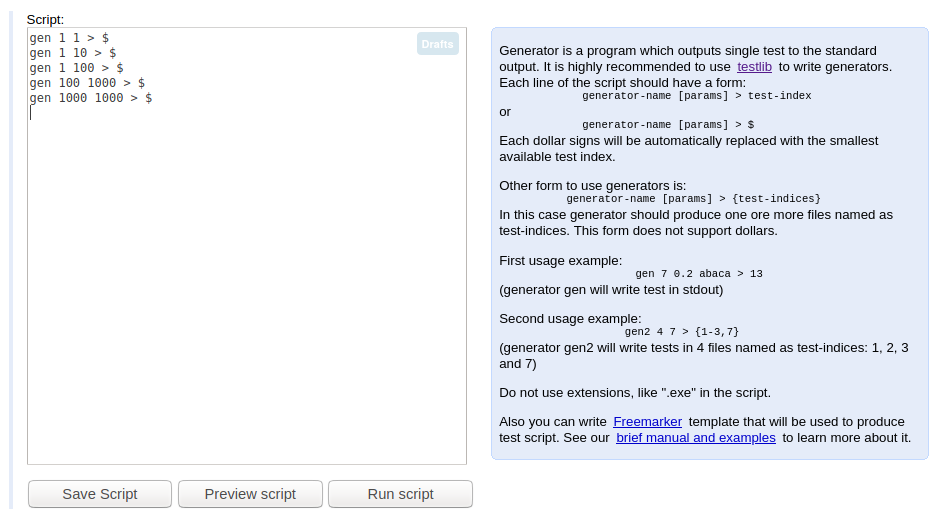
Back to the Tests tab, and update the Script. There are several forms for each line of the script, you can read about them in the description to the right of the script, let’s add some line and click Save Script.
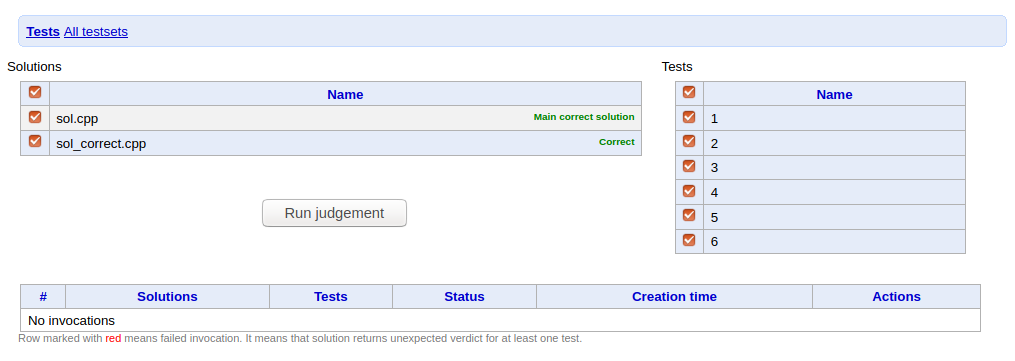
Solution files
We will skip Stresses for now and come back to it later. In the Solution files tab you can add your solutions, the first added solution is considered the Main Correct Solution or Model Solution. You can add many solutions and for every solution specify the expected verdict, in my opinion every well prepared problem should have these solutions:
- Main Correct Solution.
- Brute Force Solution - To test your solution against many small tests and be confident that you didn’t make any mistake. It doesn’t really matter the complexity of the solution, this solution must have a Time limit Exceeded verdict.
- Wrong Answer Solution(s), the problem is
dp? write a greedy solution to be sure that you have a test which produced WA, overflow solution, corner cases etc… - Time limit Exceeded Solution(s), you should add these solutions for every unwanted complexity, these solution(s) helps you to set the time limit correctly.
- Accepted Solution(s), using different approaches, different time complexity and written by different users.
- Accepted Solution(s) written in allowed languages, for example if you are preparing ICPC contest you should add solutions using C, C++, Java and Python.
Let’s write two solution files and add them.
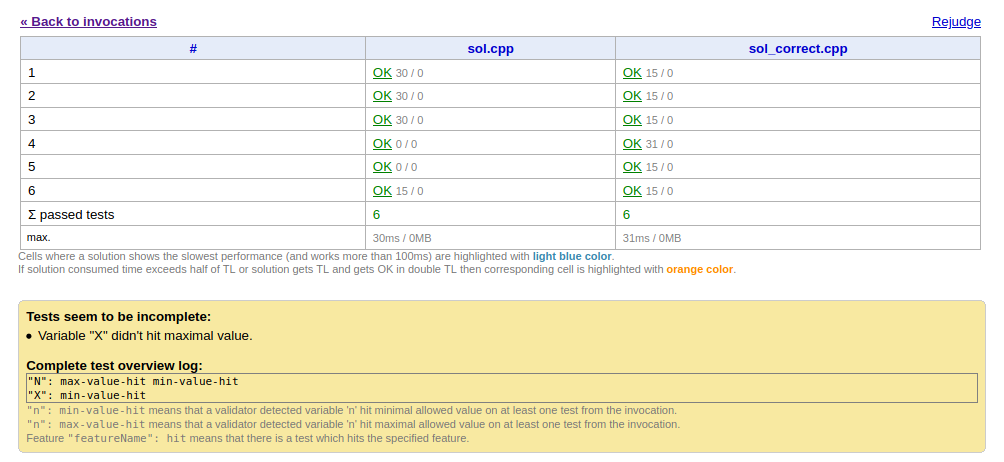
Invocations
Click on Want to run solutions?, select the solutions and tests you want to run. On this page you can see detailed reports about invocations. Invocation rows in grid are highlighted if at least one solution got unexpected verdict on at least one test.
The result of the Invocation will be:
Stresses
Stress testing is the operation to test your solution against many other tests, to check whether your solution passes them all, I have written an article about stress testing you can find it here.
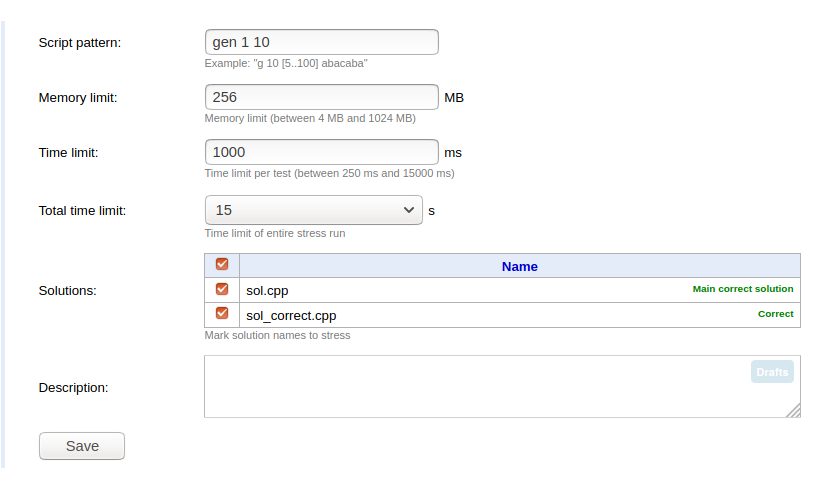
Using polygon you can run stress tests easily, just click at Add Stress and fill the form:
- Script pattern - Contains the generator name and the passed arguments.
- Memory limit - Contains the memory limit per test.
- Time limit - Contains the time limit per test.
- Total time limit - The time you want the stress testing to last.
- Solutions - The solutions you want to stress.
When you click Run then View you should find something like this:
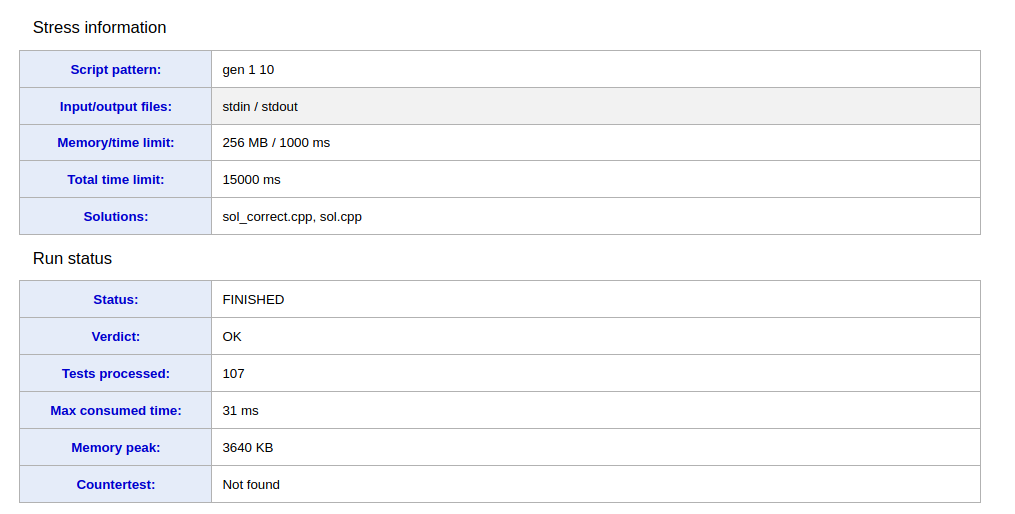
The Countertest field will contain the Counter Test found, this is the test that your solution fails in.
Issues
You can add Issues to the problem, just specify it’s type, add text to it, you can also assign this issue to anyone working with you in the problem. Add comments to it and change it’s status.
Packages
Packages are ZIP-files containing problem files in some special format. Typically packages are used by Online Judges. Polygon supports flexible model for packaging. Package contains compiled sources, and generated tests. To create the package you just need to specify it’s type, standard or Full. You can’t create package if you have changes in your edit session. Commit the changes before package creation. We will come to this later on.
Manage Access
Each user has one out of three permissions for any problem. User can have “WRITE”, “READ” or “NONE” permissions.
- WRITE - If he has “WRITE” permission, he can edit problem and grant/modify other users access to this problem.
- READ - If he has “READ” permission, he can start edit session, but it is impossible to commit it. Also such user can’t grant/modify access for the problem.
- NONE - user can’t read problem and has no way to know if it exists.
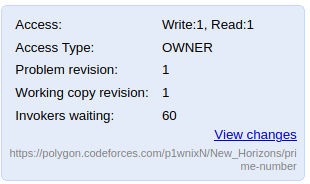
By default problem creator has WRITE permission to the problem.
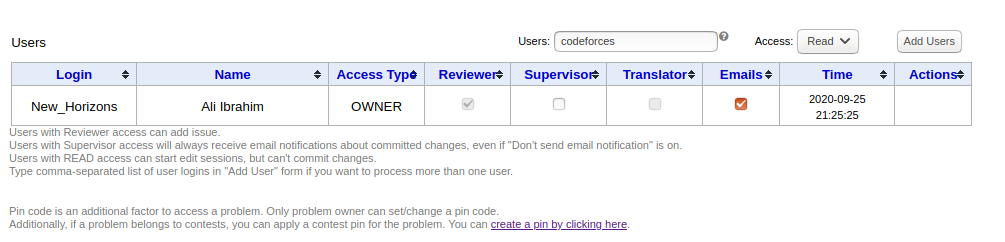
To grant other users to access this problem you must click Add Users and specify the user polygon handle and access permission (READ or WRITE). We will give Codeforces user READ access to the problem in order to add it to a mashup contest.
Edit sessions
Think about edit session as working copy placed on the server-side. You don’t loose your edit session if you close the browser or logout from the system. Users can edit problem passing following steps:
- Create edit session - by clicking start or continue in the main Problems tab.
- Make changes in the edit session.
- Commit the edit session.
Note that if you don’t commit the edit session no other user will see your changes. Also the current version of Polygon doesn’t take care about the conflicts. So if your working copy has conflict with already commited you have only one option to destroy this session. For now we can recommend you to have short time between commits. Each time you open your session from the Problem list edit session updates to the latest revision.
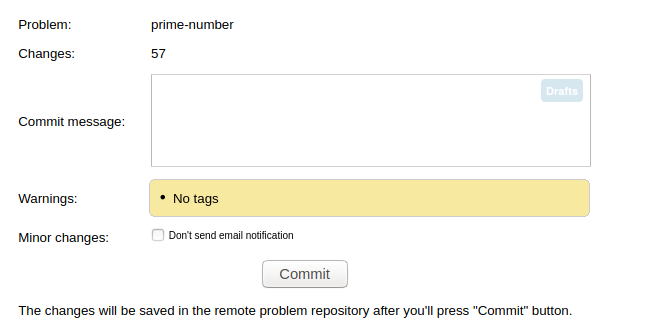
To commit the changes just click on Commit Changes in the right-lower side, you can write Commit message, this message will be sent by email to every user with access if you want to.
Add problem to mashup contest
After commiting the changes you can create the package, go to Packages tab and create a Full Package. Now you can add the contest to a codeforces mashup contest, this can be done by adding this url in the Add new problem option.
Summary
Through this tutorial we explained a lot of things, now we can summarize the whole process in these steps:
- Create the problem.
- Grant access to other users working with you, add Codeforces user if you want to add the problem to mashup contest.
- Write statement.
- Add the checker, and checker tests.
- Add the validator, and validator tests.
- Add tests, don’t forget to add at least one sample. Upload the generator in the Files tab and modify the Script.
- Add the solutions, as described above you should add many solutions.
- Run invocations.
- Depending on the intended solution complexity select the time/memory limits.
- Run stress tests.
- Commit changes.
- Create the package.
- Congrats, you have completed the problem :D
Conclusion
These are only the basics of using polygon, polygon has a lot of interesting features that I didn’t mention here, I will just leave it for you to discover. You can find the used codes (Validator, Generator, Checker and Solution files) here. If you want READ access for this problem you can write a comment with your polygon handle on the CodeForces blog or simply message me on CodeForces. I hope you liked this tutorial, please stay tuned for more.